Tuesday, October 30, 2012

Life Lately

Whew, so much is going on around here lately! My wonderful friend and old college roommate has been visiting and we've been exploring all of the amazing food the Bay Area has to offer. Here's just a small sampling...


Halloween!


I made soup...it had smoked paprika in it. I took pictures of all the ingredients but got so excited to eat it that I forgot to take a picture of the final product - oops!


We went to the Ferry Building in San Francisco aka food heaven.


Vegan donuts. SO GOOD.


I'm so obsessed with the building - so many pretty details!


Salted caramel vegan donut about 2 seconds away from being devoured.


It was a beautiful, warm fall day in the city.


Gorgeous ladies!


Happy hour drinks including my favorite cucumber basil gimlet...


All gone!


Gabe carved a Cheshire Cat pumpkin.


Margaritas and vegan Mexican food at Gracias Madre - amazing!!

Finally, we have a special edition of the Poppy picture for Halloween. Gabe created these and I think they're pretty brilliant.


As Cartman from South Park


And a ghost

And appropriately, as an evil witch on a broom : ) Happy Halloween everyone!

Monday, October 22, 2012

Inspired!

This past weekend, I took a food photography and styling class hosted by Joy the Baker and Tracy of Shutterbean at the beautiful Teahouse Studio in Berkeley! It was so fun to meet both of those talented ladies and gain a ton of photography, styling, and blogging knowledge from them!

Here's what went down...


Lots of picture-taking, sometimes while standing on chairs


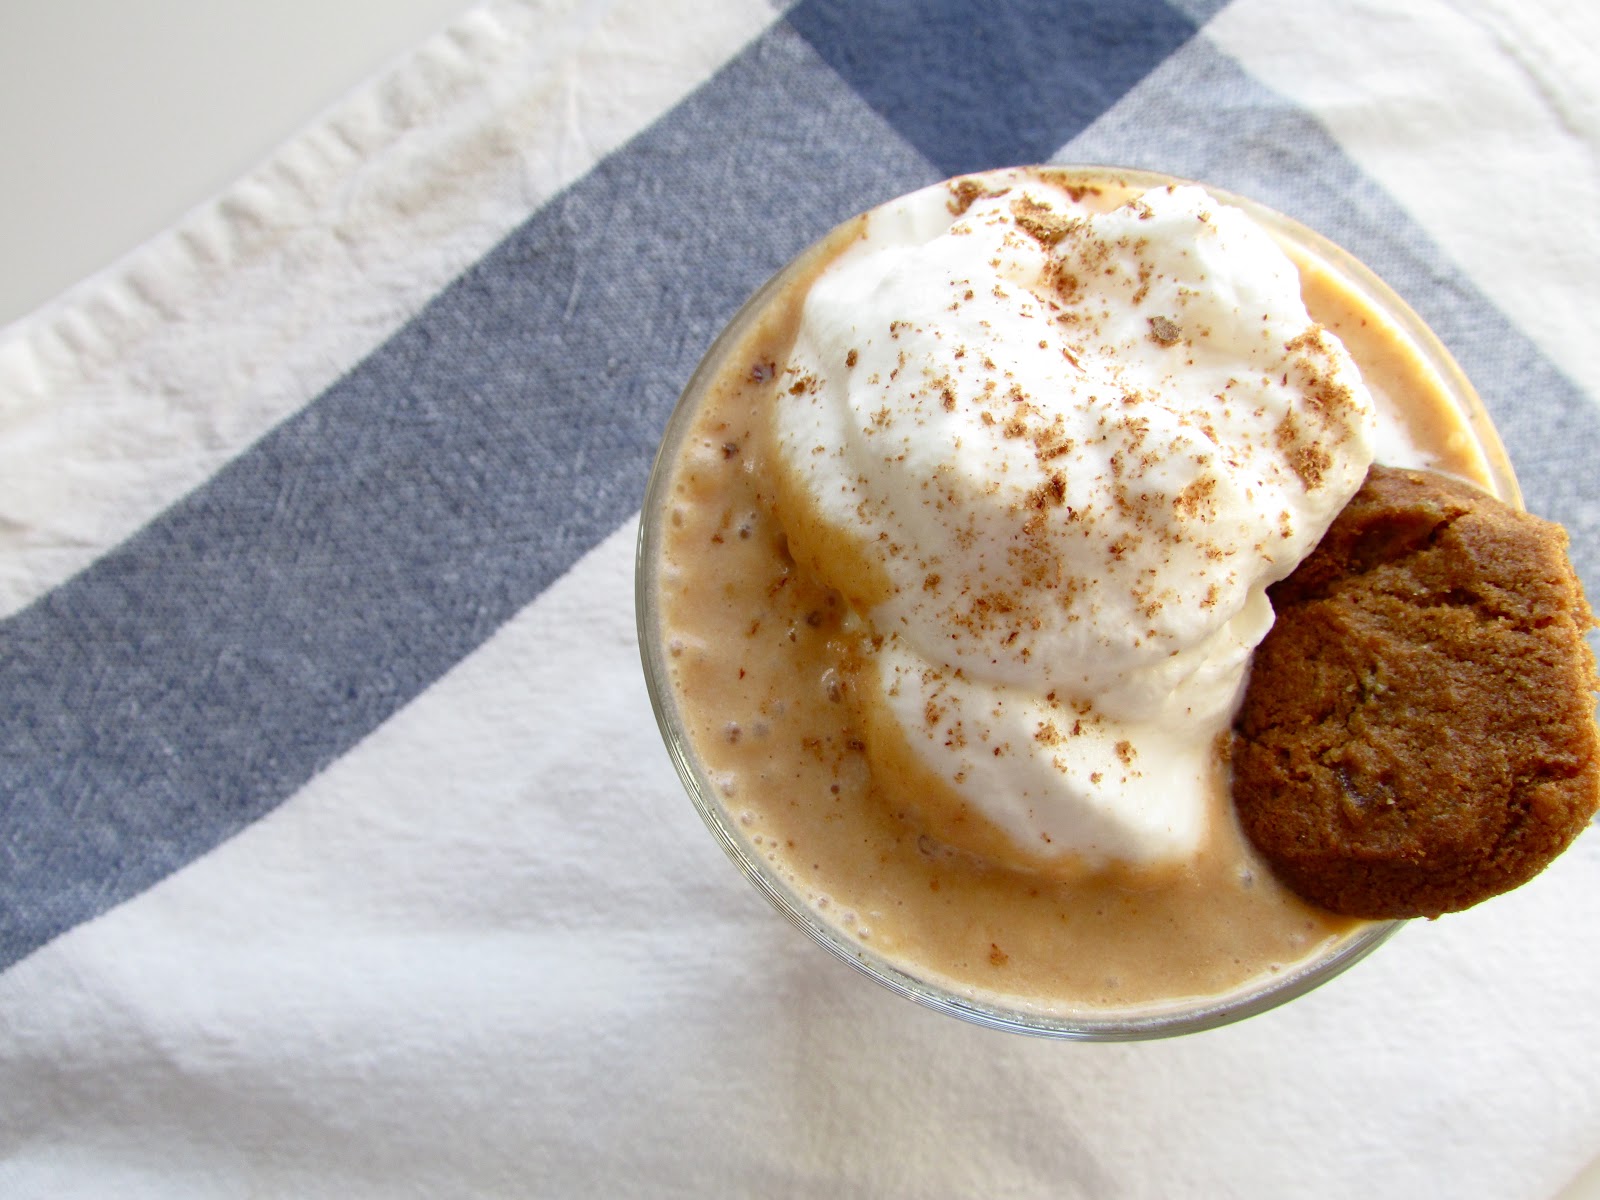
Pumpkin Bourbon Milkshakes...more on that in a second!


The cozy, beautiful Teahouse!


Ingredients shots for granola


Mmmm ginger


Here's the Pumpkin Bourbon Milkshake. It was so hard to focus on taking pictures of it because I just wanted to stick my face in it...I mean, daintily sip it from a pretty straw.

It was such a fun day! Thanks Joy, Tracy, and all the other awesome people who were there.

Sunday, October 14, 2012

Apple Pie with Pecan Crumble

Well, I must admit there hasn't been too much exciting cooking going on here recently. Part of last week and weekend, we were in Atlanta for the wedding of two great friends. It was our first time in the South and we loved it! Of course we had to sample the local cuisine - some favorites included dinner at South City Kitchen where we had an appetizer of fried green tomatoes that were enrobed in goat cheese before frying...oh my goodness I could have eaten them for my whole meal! 

Fried green tomatoes...excuse the camera phone photo

Anyway, Atlanta was so much fun but we were tired and jet lagged for most of this past week, so motivation for cooking was pretty low. I've finally gotten back into the swing of things this weekend, and experimented with a new pie recipe today! It's a twist on classic apple pie, incorporating pecans into the crust and the crumble topping. The pecans add a rich, nutty flavor, and a little bit of crunch to contrast with the sweet apples. 

This post and recipe is dedicated to my wonderful parents who got me a BEAUTIFUL new camera for my birthday, which I used for the first time for this post! Thanks mom and dad : )

Apple Pie with Pecan Crumble
For the crust:
1 cup finely chopped pecans
1/2 cup all purpose flour
1 stick (1/2 cup) unsalted butter, very cold
1/4 teaspoon salt
1 teaspoon sugar

For the filling:
4 tart apples, peeled and chopped into 1/4 inch (or so) pieces
1/2 cup brown sugar, packed
1/3 cup flour
Juice of 1 lemon
1 teaspoon cinnamon
1 teaspoon pumpkin pie spice

For the crumble topping:
1 cup finely chopped pecans
1/2 cup brown sugar, packed
1/2 stick (1/4 cup) unsalted butter, very cold
1 teaspoon cinnamon
1/2 teaspoon salt


For the crust, combine all ingredients except the butter in a large bowl. The butter should be very cold - I usually freeze it and take it out just 15-20 minutes before I'm ready to use it. Cut the butter into small cubes and using your hands or a pastry cutter, incorporate the butter into the dry ingredients until the mixture is crumbly, with the crumbs being pea-sized or slightly larger. Drizzle in just a tiny bit of cold water - start out with a tablespoon and add more as needed - to help bind the dough together. The dough should be slightly moist but not sticky - if it gets sticky, just add a sprinkle of flour. Form the dough into a ball, then press it down so it's about 1 inch thick. Wrap it tightly with plastic wrap and chill in the refrigerator for about an hour.


While the dough is chilling, you can get to work on the filling and topping! In a large bowl, combine the peeled and chopped apples with the brown sugar, lemon juice, flour, and spices. Yep, that's all there is to the filling - so easy!


For the crumble topping, use basically the same technique as the crust. Cube the cold butter and combine it with the dry ingredients until it's well incorporated and forms small clumps. Set it aside for later!

Finally, take your crust out of the refrigerator and roll it out. It's a bit prone to cracking, I think because of the texture of the pecans, but it's ok! Just smooth out the cracks and no one will notice. Press the crust into a pie pan, fill it with the apple mixture, and then top it off with the crumble. 


Bake at 350 degrees for about 40-50 minutes, or until it is bubbling and golden brown. Let it cool for at least an hour before serving. It's the perfect fall dessert!


Here's Poppy, lounging in an Anthropologie box that she has claimed as her new bed. It's filled with tissue paper and she just loves it...oh so comfortable and cozy!

Sunday, September 30, 2012

Peanut Butter Filled Chocolate Chip Cookies

You guys...I made an awesome discovery today. I may never look at chocolate chip cookies the same again - they are now exclusively a vehicle for peanut butter. See, I have a little bit of a chocolate/peanut butter problem, and I am not ashamed. For example, one of my friends in college introduced me to the amazing combination of chocolate pudding and peanut butter. Seriously, we would sit there with a container of pudding and a container of peanut butter and scoop them onto the same spoon, and it was incredible. These cookies are just another representation of that beautiful marriage between these two ingredients!

Now, I totally cheated and used cookie dough that was pre-made from Berkeley Bowl, our local grocery store. It's from a local, organic-focused store so it's ok, right? That's not to say I never make cookies from scratch; I have the Nestle Toll House chocolate chip cookie memorized. Anyway, you can use pre-made dough too or make it yourself using this recipe:

Chocolate Chip Cookies:

2 1/3 cups flour
1 teaspoon baking soda
1 teaspoon salt
1 cup unsalted butter, softened
3/4 cup granulated sugar
3/4 cup brown sugar, packed
1 teaspoon vanilla extract (I always use 2 teaspoons though)
2 eggs
12 ounces semisweet chocolate chips
*The original recipe calls for nuts but I really don't like them interfering with the purity of my cookie dough. If you want to, you can use 1 cup chopped walnuts.

Combine flour, baking soda, and salt in a bowl. In a separate bowl or using a mixer, beat the butter, both types of sugar, and vanilla extract until creamy. Add the eggs and beat until they are well incorporated. Slowly add in the flour mixture and stir until combined, then add in the chocolate chips and nuts if you're using them.

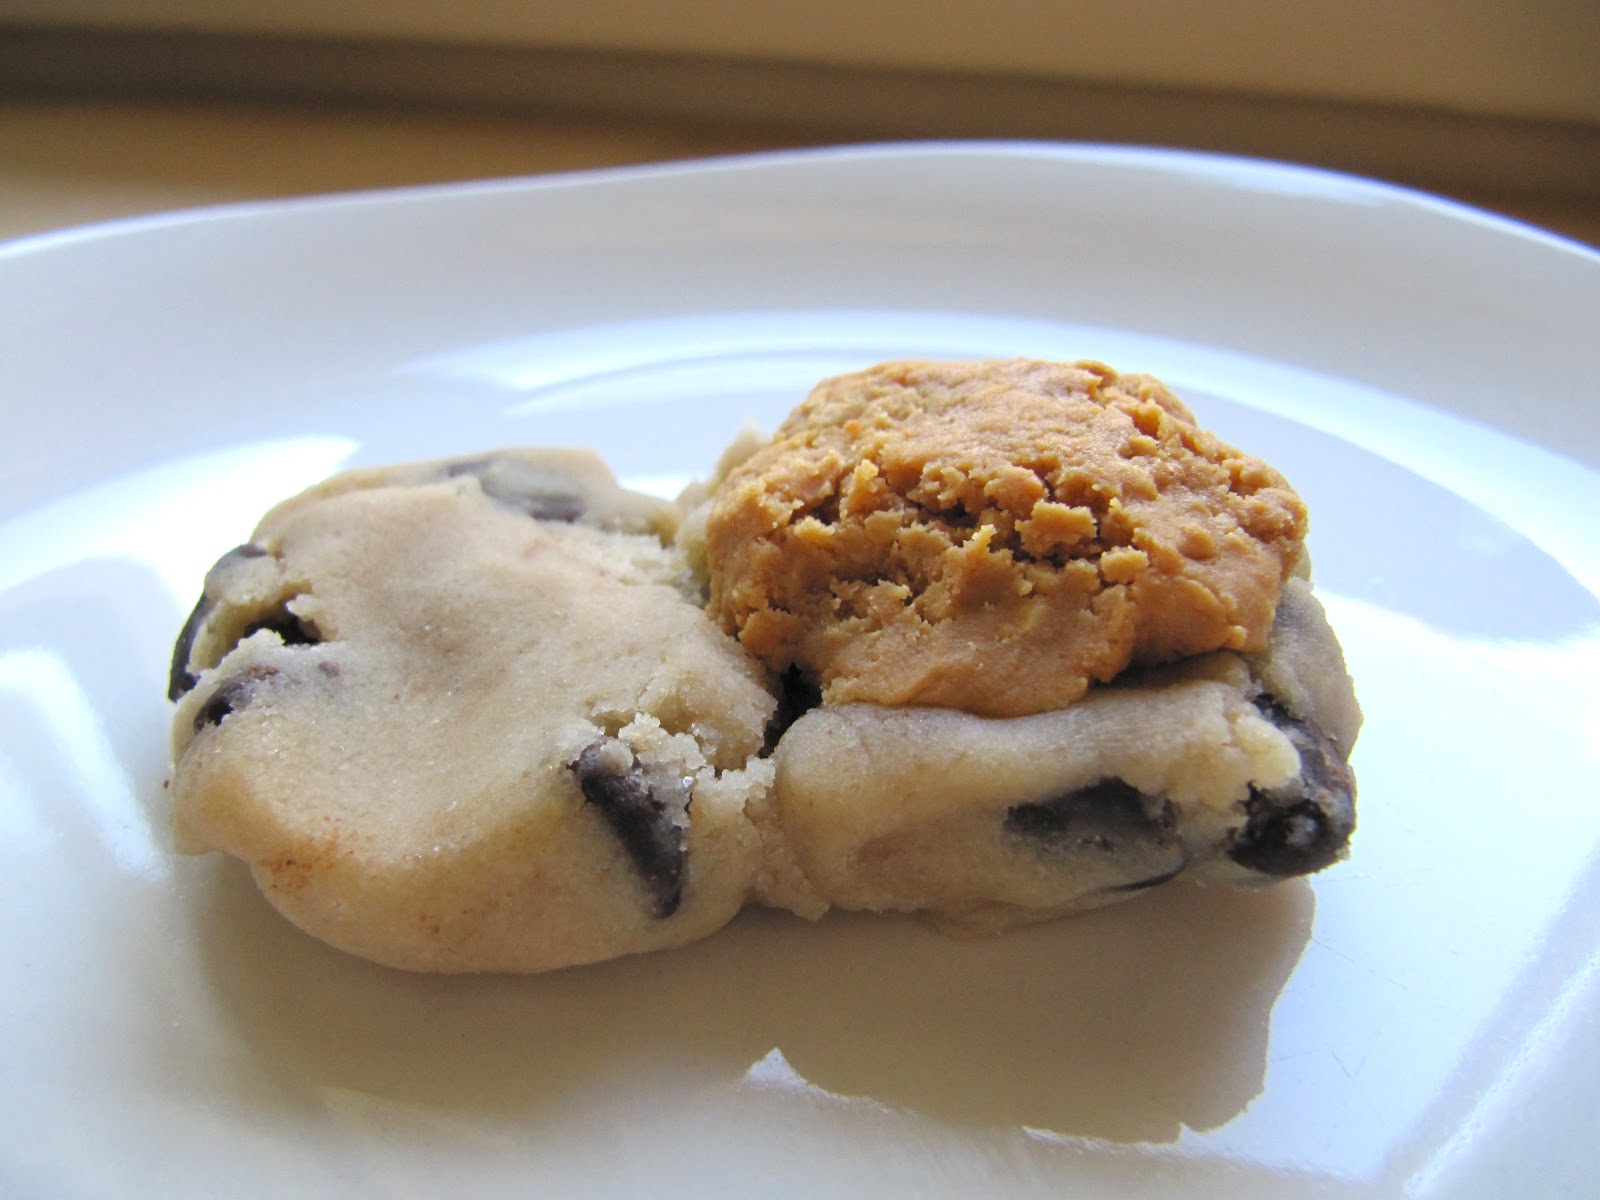
Ok, now that you have your cookie dough ready, you should probably sample a bite to make sure it tastes good (duh). Now for the fun part! Scoop out about 3 tablespoons of dough -you can estimate on that, basically just a huge scoop. Then flatten out the dough using the palm of your hand so it's about 1/2 inch thick, and mold it into kind of an oval shape, like the picture below.


Dollop a hefty scoop of peanut butter onto one half of the oval. I used salted natural peanut butter and it worked great, though you could use whatever you have on hand.


Then fold over the un-peanut buttered half to form a ball and seal the edges off so no peanut butter escapes. Repeat using the rest of the dough.


Bake at 375 degrees for about 6-8 minutes or until just brown on top - my philosophy on cookies is that they should be just barely cooked in the middle and a little crisp on the outside.


These are soooo good, especially right out of the oven.


See that little pocket of peanut butter in the middle?!


This was just too funny not to share - Gabe was working from home earlier in the week and competing for couch space with Poppy. I think it's pretty clear who won that battle...look at that smug look on her face!

Thursday, September 13, 2012

Fall Vegetable Lasagna

Hi guys! Long time no blog! 

So, I need to preface this post with a little personal story. This week, Jack's Mannequin announced that they will be (amicably) disbanding. If you knew me in high school, you'll know I was just a little bit obsessed with this band. At one of their earliest shows - a TINY show at Bottom of the Hill in San Francisco, I got to meet Andrew, the lead singer and pianist, who puts on the best live show I've ever seen (photo of us below - check out my baby face!). Not long after that, he was diagnosed with leukemia and underwent a stem cell transplant the same week that Jack's Mannequin's first album came out. Fortunately he made a full recovery and has continued making amazing music ever since. His songs were the soundtrack to Gabe's and my early dating years in high school, and they played over the radio as we drove up and down the coast of California to visit each other during college. 


Last year, we got to meet him together and tell him how much his music meant to us - it was such an awesome experience!


Anyway, thanks Andrew for the music, and thanks to everyone else for listening to me ramble! Now on to the recipe...


I've been noticing lately that it's getting dark earlier, and the morning air is just a little bit colder than usual. This can only mean one thing: it's lasagna season! I mean, fall!

Seriously though, I think lasagna is the ultimate comfort food - pasta, sweet tomato sauce, gooey cheese, and fall vegetables (and/or meat if you so choose). I whipped up a pan of it earlier this week and I'm not ashamed to say that Gabe and I ate half of it in one sitting. For this recipe, I used some late summer squash and zucchini, but you can substitute in whatever you'd like!

Fall Vegetable Lasagna:
1 package lasagna noodles (approx. 1 pound)
4 small-medium squash, halved and thinly sliced
4 small-medium zucchini, halved and thinly sliced
About 2 cups white mushrooms, thinly sliced
3 cups tomato sauce
3 cups (at least!) mozzarella cheese, grated


Start by cooking the lasagna noodles according to the package directions. For some reason these noodles always stick together, so make sure you add a few tablespoons of olive oil to the pasta water. Drain the noodles and let them cool.


Thinly slice your vegetables - you don't want them too thick otherwise they won't cook in the lasagna. 


Then the fun part - lasagna assembly! I start by spreading about 3 heaping spoonfuls of tomato sauce in the bottom of a pan (usually a 9 by 13 pan is the best but I used a pie pan here and made a smaller lasagna). Then add a layer of noodles, another layer of sauce, and on top of that a layer of vegetables. Spread a generous amount of grated cheese over the veggies, then cover it all with noodles. Continue with this noodles-sauce-veggies-cheese pattern until your pan can't hold any more! Top it all off with some more sauce and cheese which will get nice and crispy in the oven...mmm.

Bake at 375 degrees for about 40-45 minutes, or until it's bubbly and brown on top. 


I don't even know what to say about this one...photo and staging courtesy of Gabe: